Monday, July 30, 2012

July 2012 Wrap Up

It's already the end of July...and school {for us} is starting up again SO soon! We have just two more weeks of "summer" left in this household! Eeek! If you missed anything this month {cause you were on vacation or you just join OMF}, now is your chance to see what you missed this month and catch up!

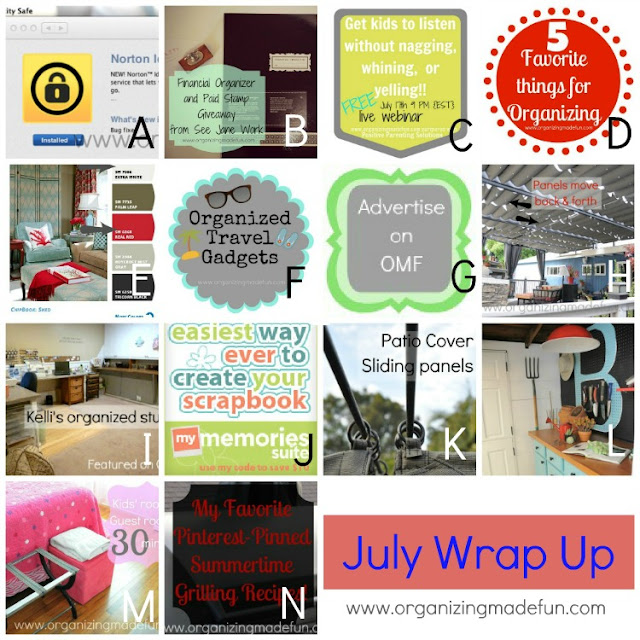
Organizing projects all month


A. Organizing My Computer Passwords
B. Financial Organizer Giveaway from See Jane Work
C. Announcement of OMF partnering with Positive Parenting Solutions for a FREE live webinar
D. My Five Favorite Things for Organizing
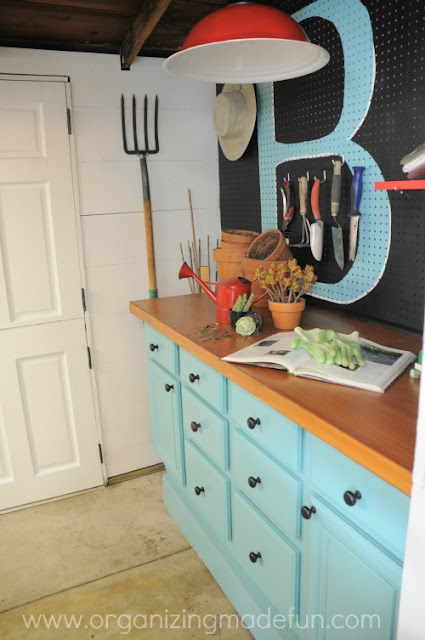
E. Reveal of my potting shed colors
F. How to travel and keep organized {tips and gadgets}
G. OMF is now advertising private ads
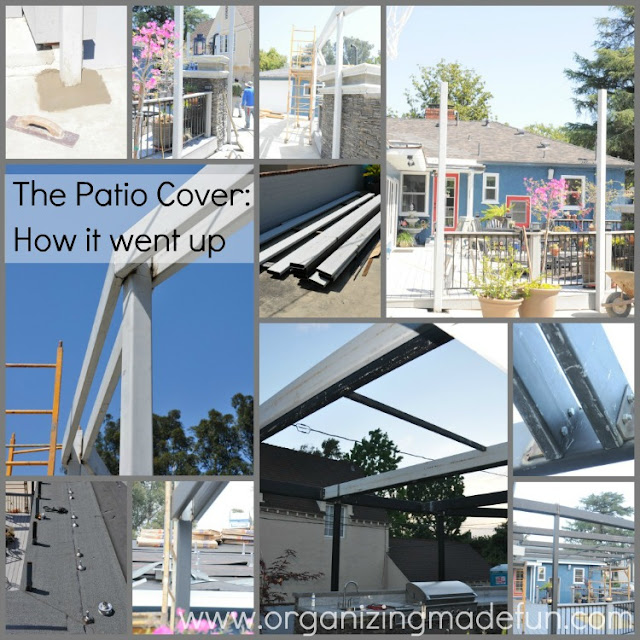
H. Our new amazing patio cover
I. Kelli's organized pet studio
J. My Memories software giveaway
K. Details of our patio cover
L. Reveal of Project shed
M. Kids room to guest room in 30 minutes {or less}
N. My Favorite Pinterest Pinned Grilling Recipes


I'd also like to introduce you to my first two sponsors! If you are an email subscriber, these sponsors are on the right side bar of my website and are VERY special to me!


 First is, 5 Dinners in One Hour!

She offers a menu subscription service that includes:


  • family friendly recipes that feed 4-6
  • detailed assembly directions
  • side dish suggestions
  • grocery lists
  • cooking instructions
  • slow cooker recipes
  • freeze for later options

Her menus use fresh and frozen whole foods with very few packaged items.  Meals are kept in the refrigerator until ready to cook which can help you ditch the drive thru!

YOU get a special deal! Use coupon code: NEW12 for 20% off. 

The Storage Loft

The second is The Storage Loft which is lovely storage for your home. There are diaper caddies, storage containers, baskets and organizers designed and handcrafted for your home with beautiful fabrics. She also does custom orders, too!


Here are a few of my favorites from her shop, although it's hard to choose! Aren't they beautiful?


Are you interested in becoming a sponsor of Organizing Made Fun? Do you have a business that my readers would LOVE to know more about? Last month I had over 800,000 pageviews...meaning that each time someone viewed a page YOUR product would be on my sidebar for all of them to see! I'll "pin" one of my favorite products from your website {with over 22,000+ Pinterest followers, that's a LOT of people who see your product} AND I'll include you once a month in a post like this for my 12,000+ email subscribers and 3600+ GFC followers to see! If you are interested, go HERE for pricing and to get started! It's easy and I use Passion Fruit Ads, which makes it super easy for you to get started and will even give you STATS of how many have seen your ad and clicked on it! So, go HERE to get started...you won't regret it!


And, thank you to all my faithful readers...you all make OMF possible to keep running and bring your more ideas and motivation! I'm working hard for YOU to keep you motivated and inspired to organize and do projects around the house!


Pin It
Photobucket 


Like what you see here? Consider becoming a follower or subscribe via email! 
Join me on Facebook - where we interact and have lots of great fun. You can also see behind the scenes pictures and fun stuff I do on my Instagram!

Friday, July 27, 2012

My Favorite Pinterest-Pinned Summertime Grilling Recipes!

I rarely post about cooking or food, but this is one thing we LOVE to do in the summer and I wanted to share with you! We truly love to grill! And, this summer we have determined to grill as many foods on our grill as we possibly can to avoid using our {vintage} very, hot oven.

Grilling BBQ

In order to get started, where did I begin? Of course I went to Pinterest! There is a TON of great recipes and ideas of grilling food on there. I started a whole Pinterest Board called BBQ that you can check out and follow, if you like to grill stuff too! All the direct links to the recipes are highlighted for you to click right over to them and check them out!

organizing recipes

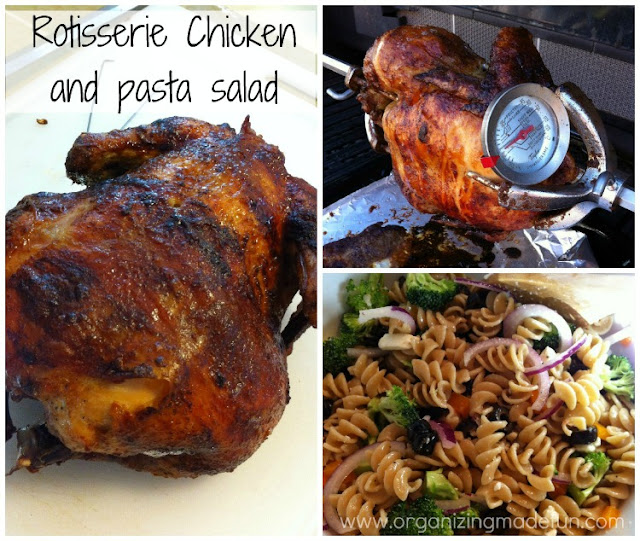
1. Rotisserie Chicken and pasta salad. If you have a rotisserie attachment on your grill, you really need to use it! It's super easy, this recipe, and the chicken is so tasty. Buying a whole chicken on sale is cheap, too - and there is nothing like doing it yourself. Yum! 

Organizing recipes

2. Grilled Pizza. This is super yummy and such a great twist on regular pizza. I can't eat dairy, so I grilled mine with goat cheese, chicken, and added a little basil on top - very tasty! It doesn't have to be round and it can be fun to have individual pizzas for each person to choose what to put on theirs.

organizing recipes

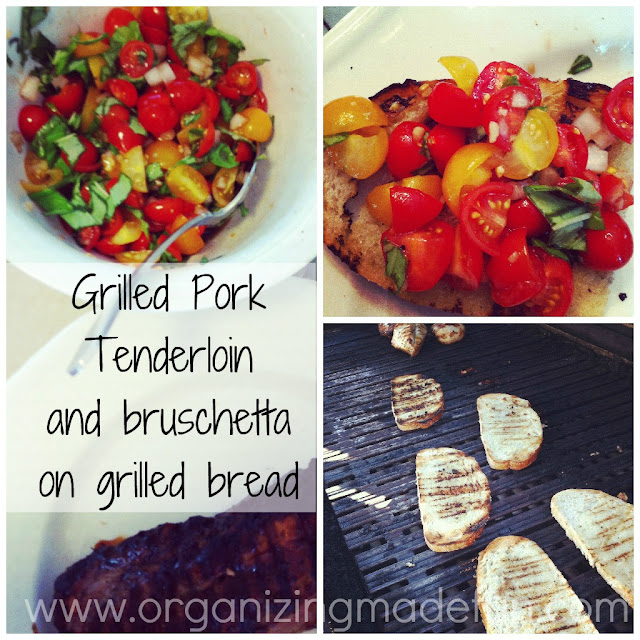
3. Grilled pork tenderloin and bruschetta on grilled bread. Oh, my goodness! This was such a yummy meal! I don't like tomatoes just plain or even much in salads...but I LOVE bruschetta. It's just amazingly yummy and I devoured this bowl of it! We took some sourdough bread and buttered it and tossed it on the grill, too.

organizing recipes

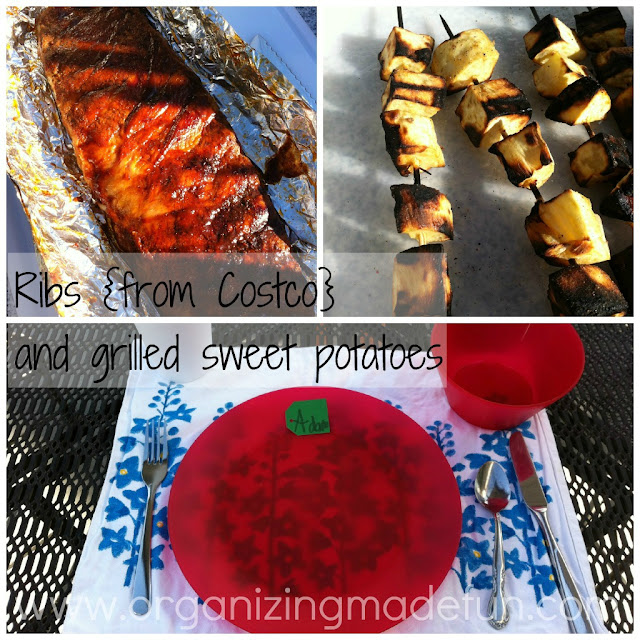
4.  Grilled Ribs {from Costco} and grilled sweet potatoes on skewers. Whenever Costco has a "sale" {aka, coupon} for ribs, I snatch them up cause my family LOVES ribs! The directions for grilling are on the package. We also love sweet potato fries but in the summer it's WAY too hot to cook in the oven because it heats up the whole kitchen. So, grilling them is a great alternative and keeps the heat outside. They are yummy!

organizing recipes

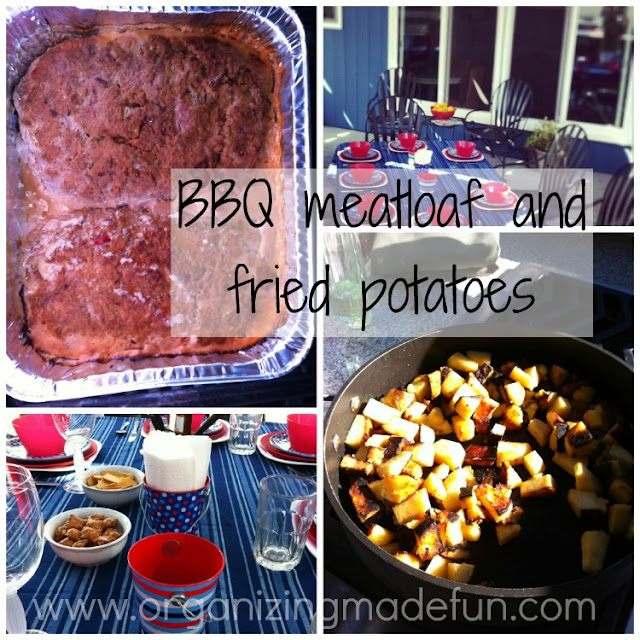
5. BBQ meatloaf and fried potatoes. I promise this tastes better than my picture can do it justice! My family loves meatloaf but there is no way I want to turn on the oven in the heat of the summer to make it, so we usually just skip it! Well, barbecuing it is the answer! I made two loaves {also substitute with ground turkey} and we had leftover meatloaf to eat, too! The fried potatoes are something my mom always made growing up. They are just cubed {or cut triangular} potatoes and fried in pan with oil - we have an outdoor burner so I use that, too!

organizing recipes

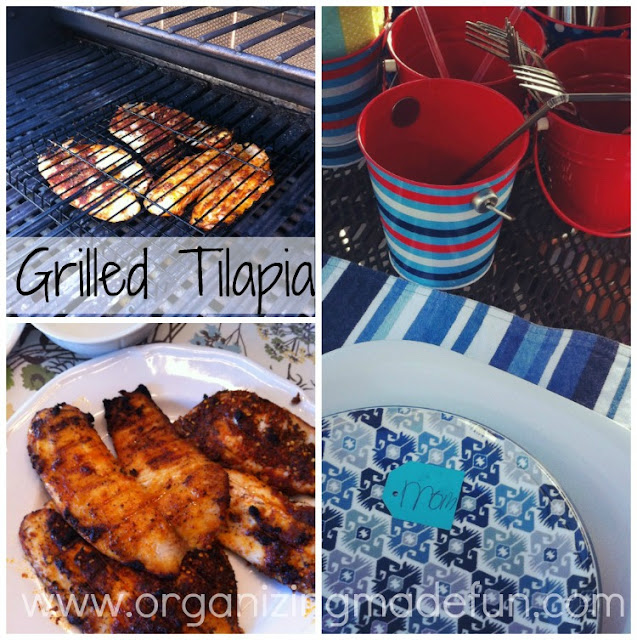
6.  Grilled Tilapia. I'm not into fish, but my Hubby and son love fish. However, tilapia is not so bad for me. Grilling it makes it even better. I like this recipe, too and use a fish basket to grill the fish in - so it doesn't fall apart on the grill. 

organizing recipes

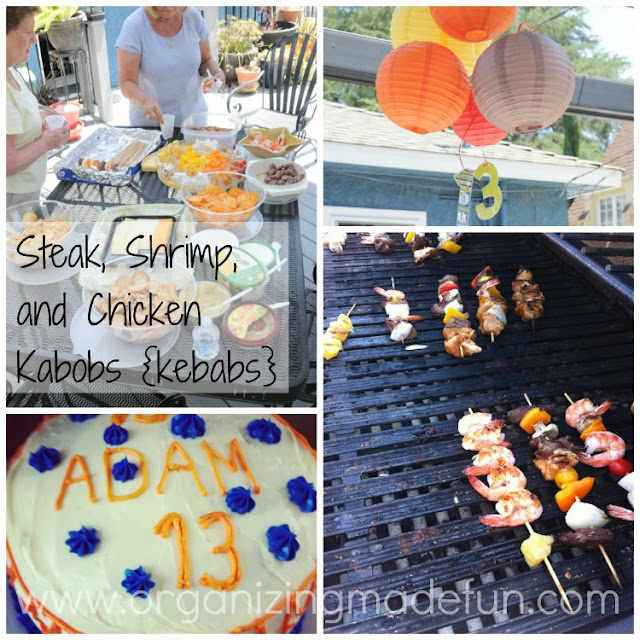
7. Chicken, Shrimp, or Steak Kabobs {kebabs}. An all time favorite, we had kabobs for our son's 13th birthday with family and a few close friends. It was SO fun. We had all kinds of toppings set out along with shrimp, steak, and chicken cut up. Everyone loved putting whatever they wanted on their kabobs, while my hubby grilled them up! Super yummy!

If you've recognized some of these photos, perhaps you follow me on Instagram? If not, you are missing out on some great behind the scenes action and daily fun I share!

You may have noticed some of the table settings...those are done by my daughter on our outdoor patio. We have some {cheap} plastic dishes I've picked up here and there and keep in my outdoor buffet, so my daughter has a lot of fun decorating the table {even putting our names at each place} for dinner. We've got more ideas to grill now, too! I want to attempt some desserts on the grill. We bought my Hubby a BBQ Griddle for Father's Day, and it goes on top of the grill, so I'm anticipating even more yummy things on the grill. How about you? What are some of your favorite things to grill?

Pin It
Photobucket

  Like what you see here? Consider becoming a follower or subscribe via email! 

Join me on Facebook - where we interact and have lots of great fun. You can also see behind the scenes pictures and fun stuff I do on my Instagram!

Parties:
Tater Tots and Jello
Six Sisters Stuff
Funky Junk Interiors
A Bowl Full of Lemons
House of Hepworths
Tidy Mom
At the Picket Fence

Wednesday, July 25, 2012

Kids' room to guest room in 30 minutes {or less}

Like many of you, I don't have a separate guest room designated for our guests, so when we have company come into town they sleep in our daughter's {pink} room. This means I need to make a "few" changes in order to get it ready for that use!


Kids room to guest room in 30 minutes {or less} :: OrganizingMadeFun.com


So, here is how I take a kids' room and turn it into a guest room in 30 minutes! Yes, the good news is that you can do this, and fast!


Declutter the room :: OrganizingMadeFun.com


1. De-clutter the bed and room. Get all the stuffed animals and toys out or hidden away! Whether it's boxed up in the garage, into an extra drawer, or contained under the bed, be sure to get those kids toys out of site.


Set the nightstand or night table :: OrganizingMadeFun.com

2. Set the nightstand. You should have some sort of side table or nightstand. Clear off any "kid clutter" and keep it simple. Set up necessities, tissue, maybe a bottle of water and a simple clock. In my daughter's nightstand, we actually cleared out both drawers {since my daughter has no dresser} so that our guest could use it to keep personal or folded items. Grab some flowers from the grocery store or your yard and put them in a mason jar and set on a tray. It's beautiful and welcoming on the nightstand.


Create hanging space for guests clothing :: OrganizingMadeFun.com


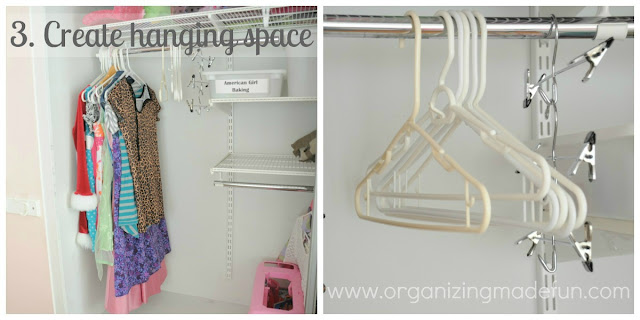
3.   Create hanging space. Push as much to the side as you can {again, you may need to move out some clothes anyway to another room for your kid to wear during visitors' stay}. Give your guest several hangers - I used regular hangers and some skirt hangers.


A place to write  - Set up the desk for your guest to write things down :: OrganizingMadeFun.com

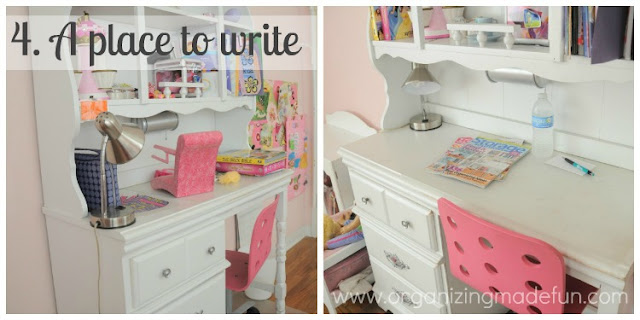
4. Have a place to write.  If your child has a desk, set it up for your guest to have a place to write with some paper, pen, and maybe some magazines to read for down time.


Have amenities for your guest :: OrganizingMadeFun.com

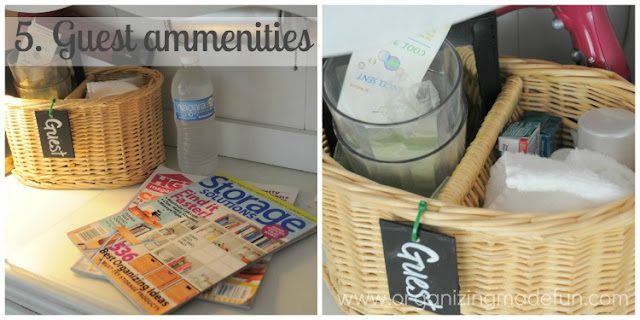
5. Place some guest amenities. Imagine what you like when you go to a nice hotel, what things do they have for you? I include shaving cream, a small deodorant, toothpaste, cups, soap, wash cloths, and a hair dryer. The next time you come home from a hotel, save your extra amenities and use them in a guest basket that you keep in your linen closet and pull out when they come, and it will be ready to go.


Somewhere for their luggage to set :: OrganizingMadeFun.com

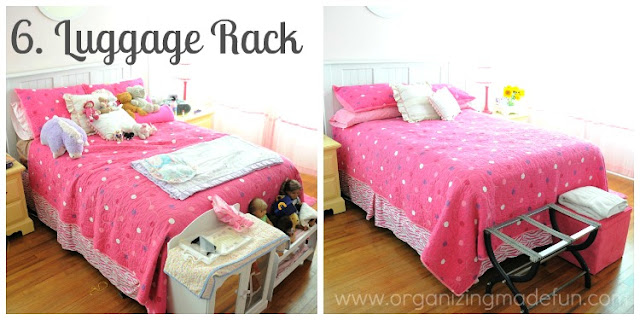
6. Somewhere for their luggage to set. I have a luggage rack that I purchased at a thrift store for $5 years ago {and use it at the end of my bed in our small master usually}. If you don't have a luggage rack, find a bench or something for their luggage to set on so they can get into it what they need, should they like to keep all their things in their suitcase.


Spare bed for the child :: OrganizingMadeFun.com

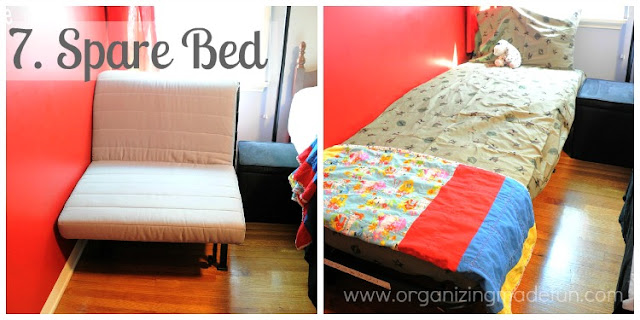
7. A spare bed for your child. If you have the ability, get an extra bed, a trundle in the other room, a mattress pad for the floor, or I have this great Ikea bed/chair we bought on Craig's list for $35. It sits in our son's room and he uses it as a chair, but it's great to pull open for him to sleep on when we have company and his sister shares his room with him.

So, there you have it! I did this in 30 minutes! I work fast and I move quick, but can have a guest room set up quickly and without a big hassle by having some of this already set. How about you...do you have a guest room or must you use a kid room too?

Pin It
Photobucket 


Like what you see here? Consider becoming a follower or subscribe via email! 

Join me on Facebook - where we interact and have lots of great fun. You can also see behind the scenes pictures and fun stuff I do on my Instagram!


Monday, July 23, 2012

The most beautiful potting shed EVER!

Are you ready for a huge before and after? Ta-da! Here is the entrance to my potting shed -- it is so beautiful! I showed you last time what colors I decided on and here they are:


It's gorgeous! I can't believe how amazing some old cupboards can look with paint. I took the colors I found with the Chip It! button and picked out the paint colors and they are beautiful! 


Look at the before and after of this potting bench! I got two new bathroom cupboards from Restore. My hubby raised them up and screwed them together. I found a door for the countertop at the same store, cut it down and stained it. It's the perfect surface for potting plants. The pendant light -- snagged for $6 -- was spraypainted to match the Real Red color that inspired me in my reveal. I got brand new pegboard -- we ripped out the old because it was gross and the holes were much smaller. Painting the large "B" (for our last name) made it much more interesting and we used some of the Reflecting Pool color on that, too. Then we organized my tools within the "B."


Here is my super-organized tool wall. We put up 1 x 10 x 8 boards (
20 of them) horizontally all over the walls. I painted them Extra White. Having the walls paneled this way makes them strong and able to support heavy tools.


You'll notice quite a dramatic before and after for this wall. We went through all the tools and got rid of some (though fewer than I'd wanted to). With the wall set up this way it's easier to hang tools in all directions.


The last wall is the shelf wall. Even my accessories here match the color scheme -- with the red cushions and turquoise organizing bins (like the Real Red and Reflection Pool). 


You can see that the old shelves were taken down. They were useless. Having the new, open shelving allowed for the large organizing containers. After a lot of cleaning and giving away, I was able to reduce the number of bins I needed. You can see I have ample space left to add more things. 


So here is how I applied the colors -- see above. I got all the colors I wanted together. It looks amazing! It's like a jewel attached to our garage and makes me want to jump in there and start potting some plants!


What do you think? Do you love it?
Pin It

Photobucket 

Thursday, July 19, 2012

Our patio cover: all the little details

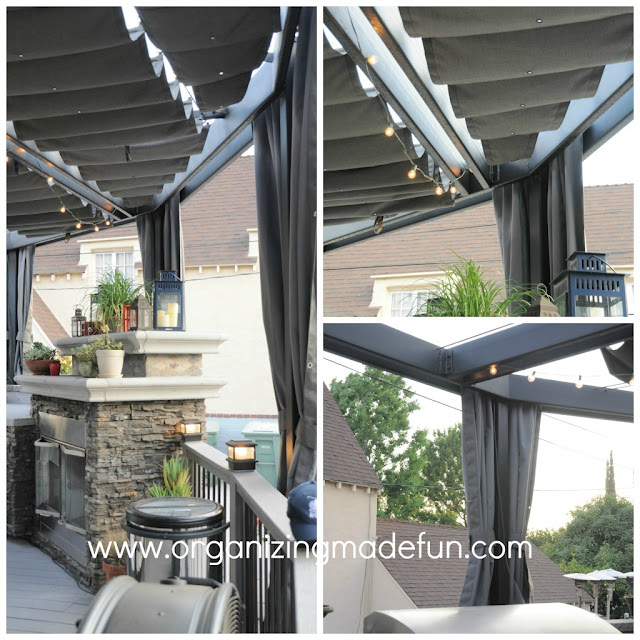
Last week I revealed to you our new patio cover. It's an absolute wonderful addition to our outdoor kitchen and deck that my hubby built himself. We have been talking about needing a cover for years and finally decided to take the plunge - since it's not something he can do himself. But, it took a great deal of planning and many man hours to get it to look like it does. Some of you have a great big finished basement, in comparison this is our "basement."


outdoor kitchen patio


You can see above that there was some serious planning to get these enormous beams ready. They had to start by cutting our driveway and sinking the large vertical beams two feet under. The top of the beam, from the driveway, is about 12 feet high. There are also beams on our roof {remember we had to put a new roof on recently}. The city got involved and required a "bit" more welding and structural soundness than we had originally "planned" {meaning more $$ for permits and man hours} so this structure can LITERALLY hold a second story should we ever decide to move up there - or maybe park a car or two!! So, the canvas panels that are there now are certainly not going to pull down the structure!


Patio cover outdoor kitchen


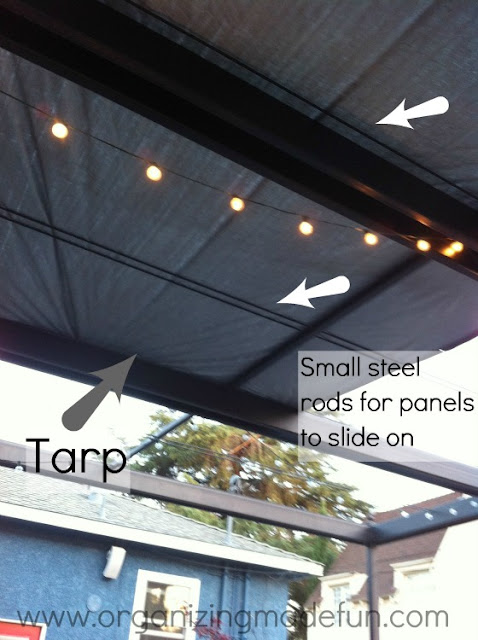
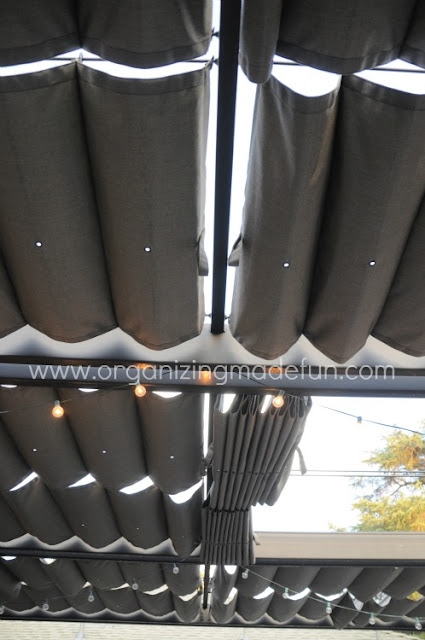
The men welded this thing for TWO solid weeks. There are all kinds of cross beams, but there are also some small steel rods that you can see that are for the panels to hang from.  They also primed and painted the entire structure. Then they came out to measure for the cloth panels and for about a month we strapped a tarp on the top of the structure - to give us an idea what it would be like, and to shield us from the scorching sun.


gray and tweed


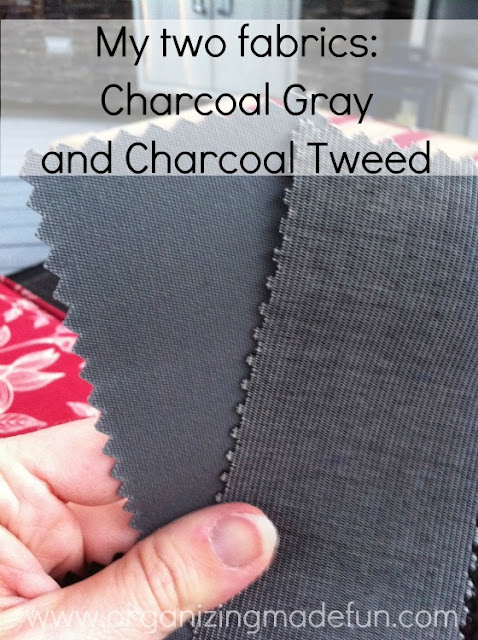
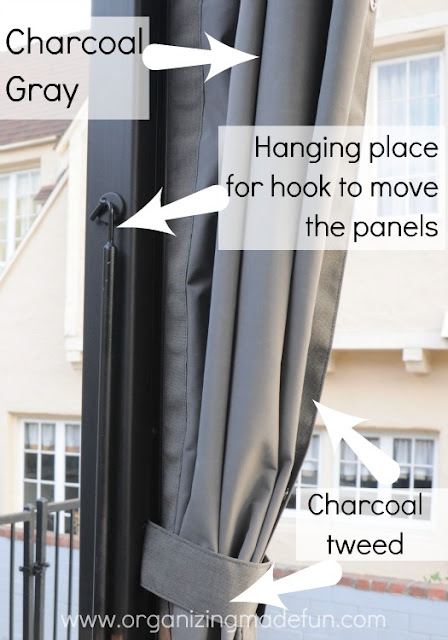
I chose two different fabrics for the panels. I have a charcoal tweed that is used on all the panels - that's the one on the right, above. Then, for the drapes, I used a charcoal gray with the tweed coming down the sides with the tie-backs in the tweed also.


tweed and charcoal gray


You can see above, where I put the two fabrics. It's subtle, but gives more of a tie-in with the panels on the roof/cover. I also chose "boring" dark colors because we have S-M-O-G here...it's dirty and it's nasty. So, keeping these a dirty color will help to keep them from looking dirty - the tweed can help mask that on the roof panels especially. 


patio cover deck outdoor kitchen


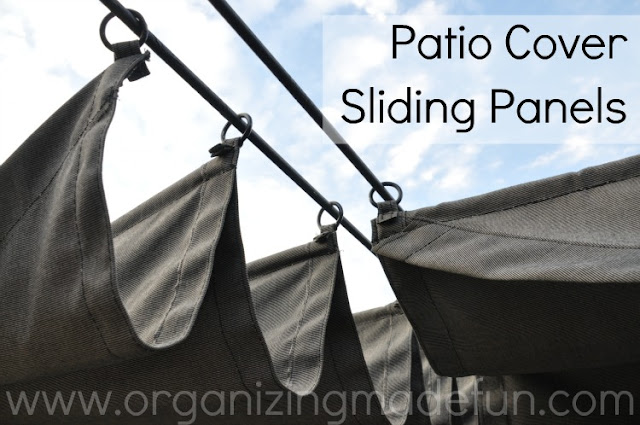
You can see the Charcoal Gray Tweed panels above after they were {custom} sewn and with the rings attached to them. They are strong and sturdy. 


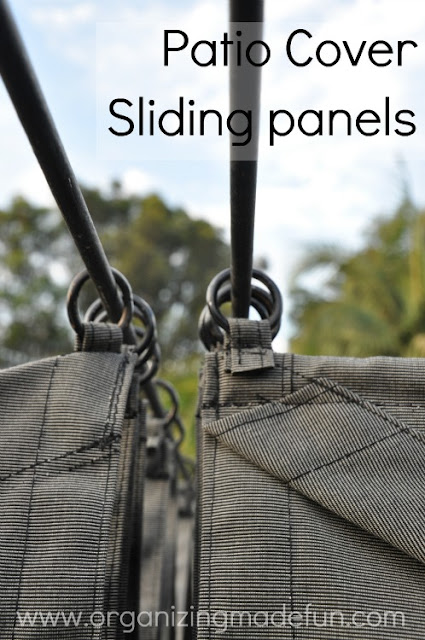
outdoor kitchen rod rings


Here's another view of them pull back and up close.


Use hook to pull panels back


And to pull back the panels, you simply use the hook and pull across. It's got the possibility to move back all the panels --  in the winter when we want more sunlight or a few at a time when we want light here and there. 


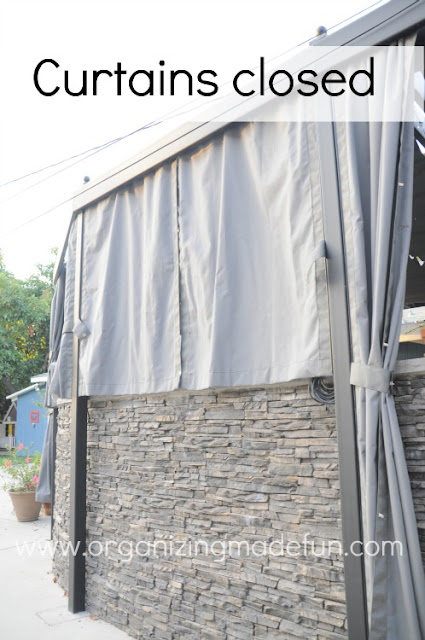
Curtains closed


You can close up all the curtains in the late afternoon to keep the sun out or even to have more privacy. You may have noticed above that we are rather close to our neighbors - we are all right on top of one another here in our area, but the curtains add some necessary privacy {although we like all our neighbors and they are all very sweet}. 


Magnetic hooks for lighting


To hang the lights we bought magnetic hooks - since the entire structure is steel, it's the best way to hang just about anything. I spray painted the hooks black so you can't even see them. They blend right into the structure. 


Grommets and panels pulled


Some of you wonder what we do if it rains...Well, it's not rain-proof, so if it rains we get wet! But, here we normally have rain in October and February - occasionally we might have a "freak storm" {we did just last week} and it rains in July! But, in the "winter months" I just store the couch cushions in the shed and we can leave the panels open. There are grommets in the middle of each one for drainage - so it really doesn't matter if they are open or closed when it rains. Everything out here is pretty much weather-proof. We know it will get wet or hot or windy. The panels should not have too much trouble in the real windy days - our contractor has a similar set up at his house just a few blocks away and has virtually no maintenance on his.


angles, rings


And last, I want to show you some of these crazy angles of our deck that is tied into the patio cover. Some asked about whether this is custom - yes, very much so. You may wonder about the cost...well, I won't tell you exactly how much it cost - unfortunately it was more than originally expected since our city added many expensive costs we weren't expecting, but overall it was about 5% of what we actually paid for our home six years ago - that doesn't seem like that much when I say it that way! And, being that this is Southern California and this IS our dining room {which happens to be outdoors} AND if you knew us well, you'd know that it is WELL used - we host people over weekly. I hope you have any questions answered that you were wondering about the patio cover! Thanks for all your sweet comments!

Pin It
Photobucket 


 Like what you see here? Consider becoming a follower or subscribe via email! 

Join me on Facebook - where we interact and have lots of great fun. You can also see behind the scenes pictures and fun stuff I do on my Instagram!


Parties:

Tater Tots and Jello

Wednesday, July 18, 2012

Where I am today!

I'm over at The Better Mom today giving you 10 ways to be more hospitable. I have shown you my outdoor patio and deck. Well, it gets heavily used. But, you don't have a fancy deck or patio to have people over or show hospitality. 


ten ways to be more hospitable


We didn't for years and years. We just started having people over and enjoying them. Find out what you can do to be more hospitable this summer...inside or out, big or small space!


Pin It
Photobucket


Like what you see here? Consider becoming a follower or subscribe via email! 

Join me on Facebook - where we interact and have lots of great fun. You can also see behind the scenes pictures and fun stuff I do on my Instagram!